Add Income
Add Expense
Edit Income
Edit Expense
Payment Reminder
This menu includes
submenus to Add Income/Expense and Edit Income/Expense. Various submenus are
shown in Figure D. Before adding Income or Expense in a Category, you should
once add this Category in Add/Delete Category window. You
can take it from program interface, ie. Icon with blue square.
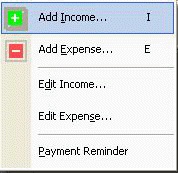
Figure
D. Transactions Sub Menu
19)
Add Income: This
accepts Income details from the user. Entries for Unit/Branch/House, Income
Category, Transaction Date, Amount, and Description/Keyword can be made here. Make
sure you have added required Income Category once in the Add/Delete
Category window. You can take Add/Delete Category window from program
interface, ie. Icon with blue square. Add Income window is shown in Figure 18. While
adding Income, you may use Tab/Enter and Up/Down arrow keys for selection.
Instead of selecting items in the combo box using Mouse pointer and Up/Down
arrow keys, you may type starting letters on the keyboard to display each.
During continuous entries, Tab/Enter key may be used repeatedly if you need
cursor to be on the Amount typing space.
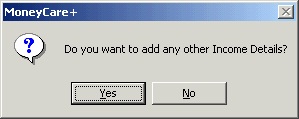
Figure 18. Add Income Window
After
entering Income particulars, if you click Add button or press Enter key, it will
be added to the Income list and will give you chance to add another Income.
Figure
19. Confirmation Window
20)
Add Expense:
This is similar to Add Income option. This accepts Expense details from the
user. Entries for Unit/Branch/House, Expense Category, Transaction Date, Amount,
and Description/Keyword can be done here. Make sure you
have added required Expense Category once in the Add/Delete Category
window. You can take Add/Delete Category window from program interface,
ie. Icon with blue square. Add Expense window is shown in Figure 20. While
adding Expense, you may use Tab/Enter and Up/Down arrow keys for selection.
Instead of selecting items in the combo box using Mouse pointer and Up/Down
arrow keys, you may type starting letters on the keyboard to display each.
During continuous entries, Tab/Enter key can be used repeatedly if you need
cursor to be on the Amount typing space.
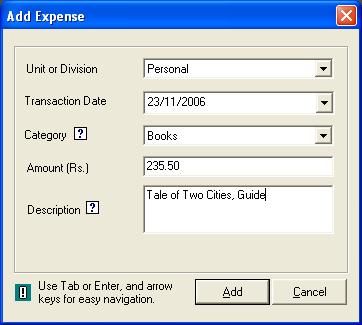
Figure
20. Add Expense Window
After
entering Expense particulars, if you click Add button or press Enter key, it
will be added to the Expense list and will give you chance to add another
Income.
21)
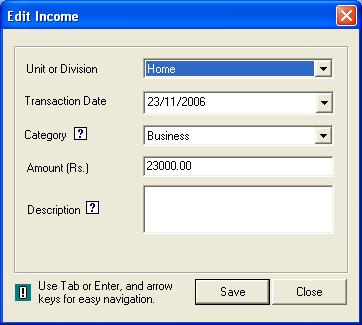
Edit Income: This
option allows you to Change or Delete Income details. Edit Income window is
shown in Figure 21.
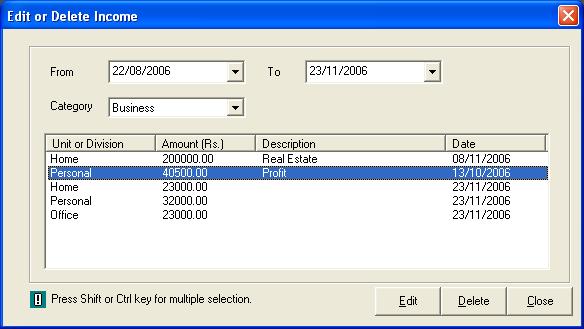
Figure
21. Edit Income Window
When
you select the Category that you want to Edit or Delete from the combo box, all
the relevant entries in different Unit/Branch/House will be displayed. If you
select an entry from the list and click Delete button, confirmation message box
will appear and then selected entry can be deleted according to your response.
You can select multiple entries by pressing Ctrl or shift key and can delete, if
you require so. If you click Edit button, another window will appear as shown in
Figure 22.
Figure
22. Save Edit
In
this window, you can change Amount and Income Description/Keyword. Then
click Save button. If you click Close button without clicking Save
button, there will not be any change in the Amount and Description.
22)
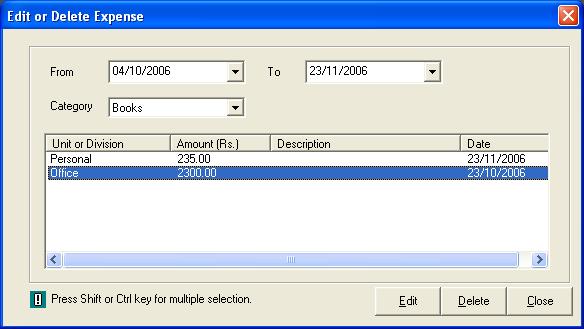
Edit Expense: This
option allows you to Change or Delete Expense details. Edit Expense window is
shown in Figure 23.
Figure
23. Edit Expense Window
When
you select the Category that you want to Edit or Delete from the scroll down
box, all the relevant entries in different Unit/Branch/House will be displayed.
If you select an entry from the list and click Delete button, confirmation
message box will appear and then selected entry can be deleted according to your
response. You can select multiple entries by pressing Ctrl or Shift key and can
delete, if you require so. If you click Edit button, another window will appear
as shown in Figure 24.

Figure
24. Save Edit
In
this window, you can change Amount and Expense Description/Keyword. Then click Save
button. If you click Close button without clicking Save button, there will not
be any change in the Amount and Description.
23)
Payment Reminder:
This option helps you to remind
the payment details with payment date, amount to be paid etc. between a
particular period of time. Payment Reminder window is shown in Figure 25.
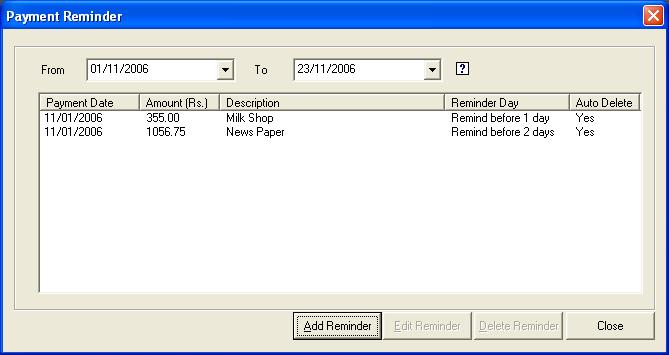
Figure 25. Payment
Reminder
You
can Add new payment reminders by giving details to the Add Payment Reminder
window which pops up on clicking the Add Reminder button. The Add Payment
Reminder window is shown below.
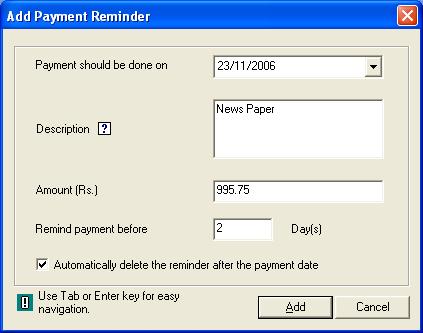
Figure 26. Add Payment
Reminder